Today I bring you something new - a guest post. It feels strange to hand over the reins to someone else, but I'm aiming to do this about once a month (depending on how it goes) as a way to introduce readers to some of my favourite crafty folk. I'm thrilled that several of my friends from back home have agreed to participate to get the ball rolling. First up is my good friend Allie. Here's a little bit about her:
Website: ducklyandjuicy.blogspot.com
Shop: www.etsy.com/shop/ducklyandjuicy
What do you make? I'll try to make anything that inspires me. In my shop I mostly sell baby goods and accessories - lately I've been focusing on crocheted hats and photo props.
What is your first crafting/making memory? My Nana taught me to knit when I was around 8 years old. After that, my mom taught me crochet, cross stitch, and hand sew, and it took off from there!
If you had all the time and money in the world to make something handmade, what would it be? I wish I had the time and money to make ALL my kids clothes. Although I would also be happy to invent a gadget to get a baby back to sleep on its own without me having to get out of bed!
Now, take it away, Allie!
Thanks for having me at Milkybeer today Kim! Kim is always a source of inspiration and knowledge for me as a crafter, so I’m happy to share a little project with her and her readers.
How To: Quick and Easy Kiddie Hooded Appliqued Bath Towels
I knew I wanted to make a handmade gift for both my kids for Christmas, but didn’t want to (couldn’t) spend a lot of time on working on a project, times two. I noticed my son, who is nearing 6 months, was quickly outgrowing his skimpy baby bath towel. Bingo, project!
I had recently borrowed a copy of
Lotta Jansdotter’s ‘Simple Sewing for Baby’ from a friend and noticed she had a baby towel project in the book. Perfect. I headed off to the store to buy the required materials – a full size bath towel and matching hand towel. I bought high quality, Egyptian cotton towels as I wanted these to last for years and be able to stand up to the abuse of repeated washings and dryings.
Late one night after both the munchkins were FINALLY asleep, I sat down to start. First instruction - cut your bath sheet into a square. Whaaaaaat? Cut my beautiful (expensive) towel up and make it smaller? The whole appeal of using a big bath sheet for me was to have a huge, thick, plush towel to wrap around cold little bodies out of the tub on cold winter nights. Following the project instructions would cause me to lose almost a third of the towel. Sure, I could cut it up and make washcloths out of it, but that just wasn’t appealing to me.
Rash decision made – I was going rogue on the project and winging it. I still wanted to make it hooded, but not cut the towel at all. I decided instead of sewing a hood into a corner of a square, I would make it more of a bath ‘cape’ and sew the hood on to the top of the towel. Clear as mud? Here’s what I did:
Making the hooded towel:
Step 1:
I folded the
hand towel in half lengthwise and sewed down one side to make a little ‘hood.’
Step 2:
I found the middle of the
bath sheet by folding it in half, and I marked it with a safety pin.
Depending on how your towel is finished, you can decide how to join the hood to the bath sheet. I wanted to use the natural edge of the finishing to help me sew in a straight line (yes, even semi-experienced sewers have trouble sewing in a straight line when they are really tired).
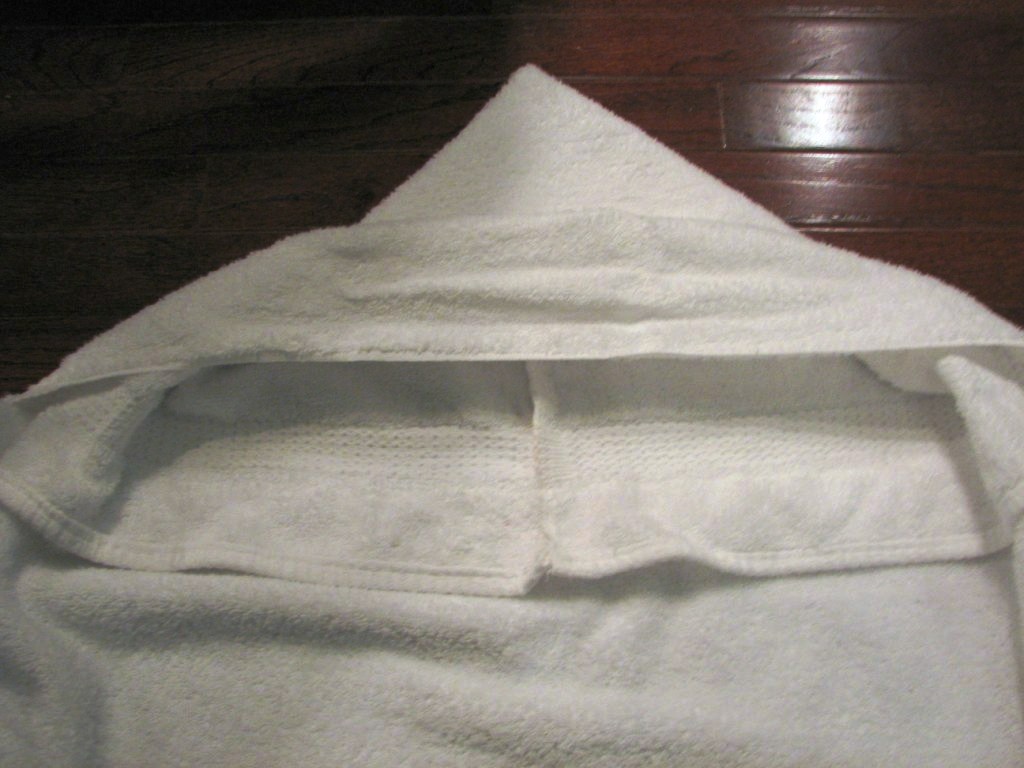
Step 3:
Line up the center of the flat bottom part of the hood with the marked center of the top of your bath sheet, and pin (wrong sides together). Sew them together. I used lots of backstitching at the edges to make sure the towel would be sturdy if it was hung up by the hood. You could also sew a little loop into the top of the hood to hang it up by, but I was too lazy and tired to add extra work at this point!
TIP: The finished edges of the towels are thick, and I broke a needle trying to sew through them (again, I’m blaming it on the tiredness). I would suggest hand sewing through these thick edges instead.
The sewing part finished, these towels sat in my sewing room for a week or so, until two days before Christmas when I realized that I had wanted to personalize them. Crap.
Optional personalization:
I broke out the Wonder Under and my scrap stash. I wanted to do each of the kid’s initials on the back of their towel. You can get fancy with your font by printing something out on your computer, but pressed for time, I just free-hand drew my letters onto paper. I did a lower case ‘b’ for my son, and had to do ‘L’ for my daughter, as otherwise I’m sure I would be asked ‘Why does my towel have the number 1 on it?”
I cut out the letters I drew, traced the letter onto my cotton and onto Wonder Under, cut them both out, and used my iron to apply Wonder Under to my cotton letter following the directions on the package.
Remember to reverse when tracing onto Wonder Under (doh!) as I had to apply the Wonder Under directly onto my towel and that made it hard to apply the letter in the next step as it was hard to see on the white towel. I then ironed my letter onto the center of my bath towel (I eye-balled where to put it based on the location of the hood at the top). I straight stitched around the edges of the letter to prevent fraying (zigzagging would probably be better, but this worked fine for me).
Viola! Done!
For a quick project that I kind of made up as I went along, I’m really happy with how they turned out. My daughter LOVES her towel, and although my son’s is MASSIVE for him, he sure loves being cuddled up in it after his bath! I’m sure these towels will last for ages, and they have washed really well.
Do you have something (project, tutorial, etc.) to share with Milkybeer readers? Send your submission to heymilkybeer [at] gmail [dot] com.